How to config GoDaddy's domain on Github Pages properly

How to config GoDaddy's domain on Github Pages properly
By default when you upload a repository and host using Github Pages, the URL who GitHub displays is, in the majority of cases, pretty ugly.
Today in this post i'll show you how to connect new GoDaddy custom domain to Github Pages in few simple steps. Are you ready? Let's start!
Step 1:
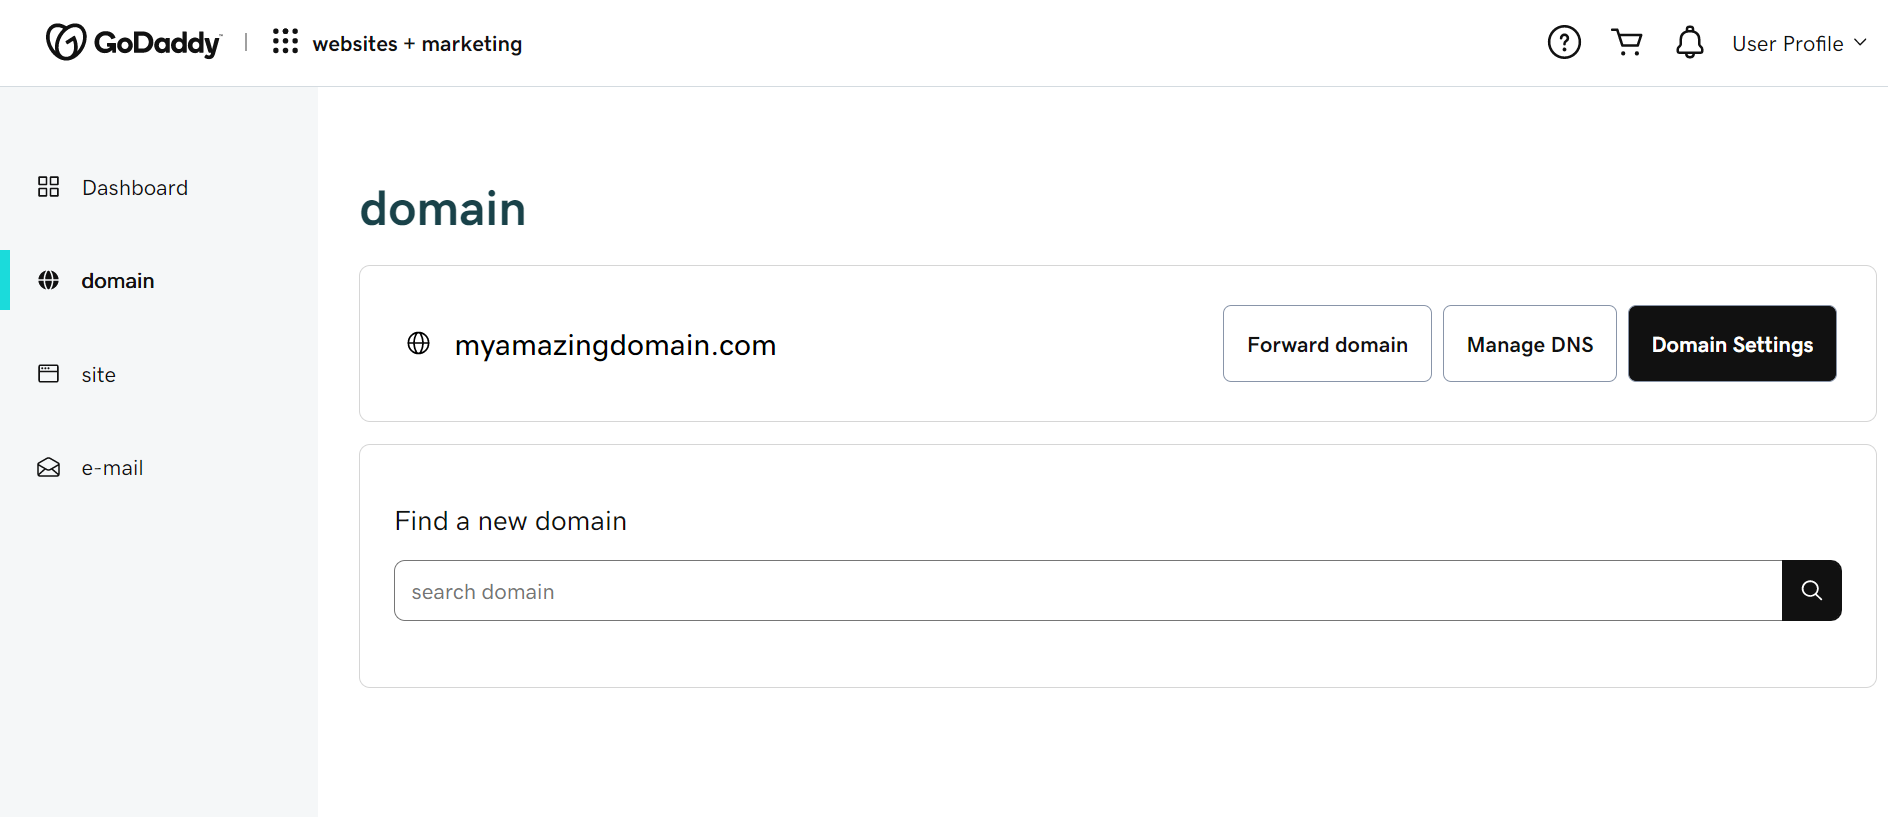
Go to godaddy.com, register, and buy new custom domain. Once you've done it, go to the dashboard page in your account and click on domain's tab. Now you'll be able to see the domain you've purchased!
Step 2:
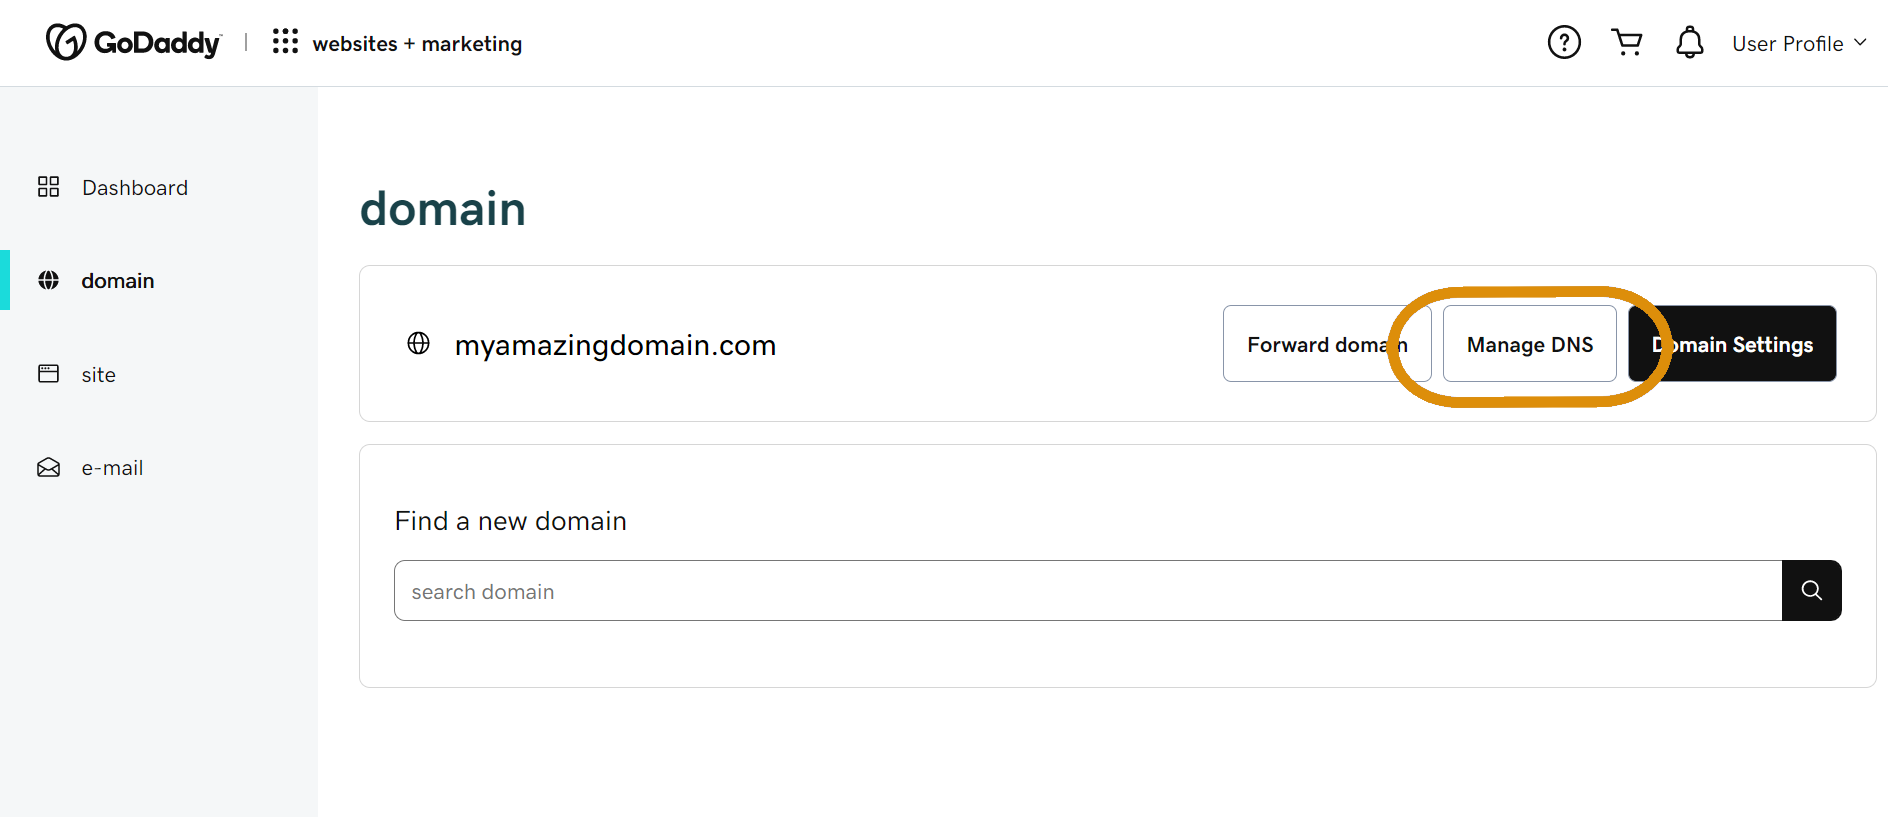
Click on 'Manage DNS'.
Step 3:
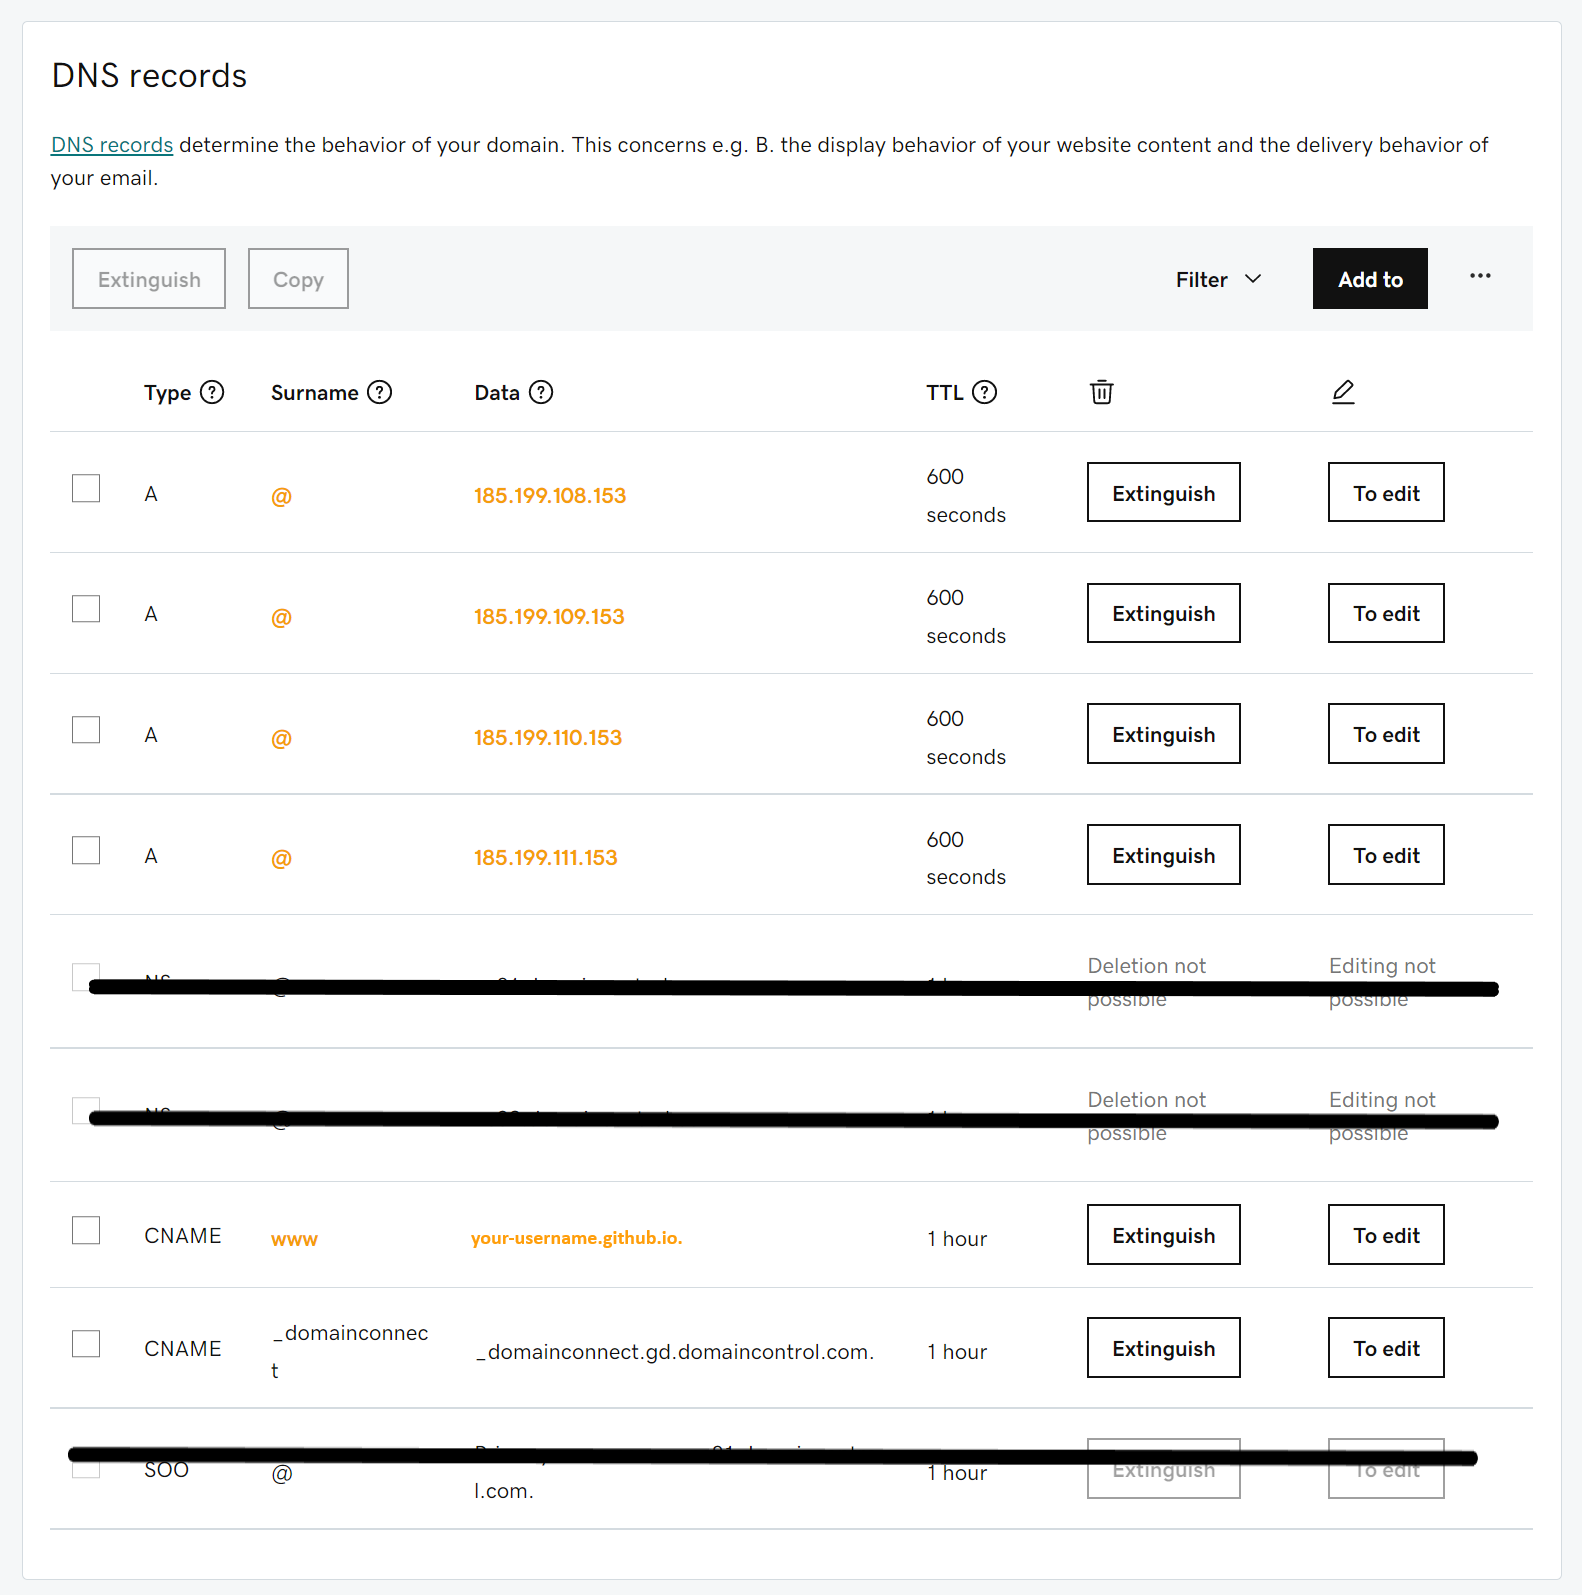
Add the same records as the image down below. The only thing you must change is 'your-repo-name.github.io' with the name of your repo without any subdirectories.
Step 4:
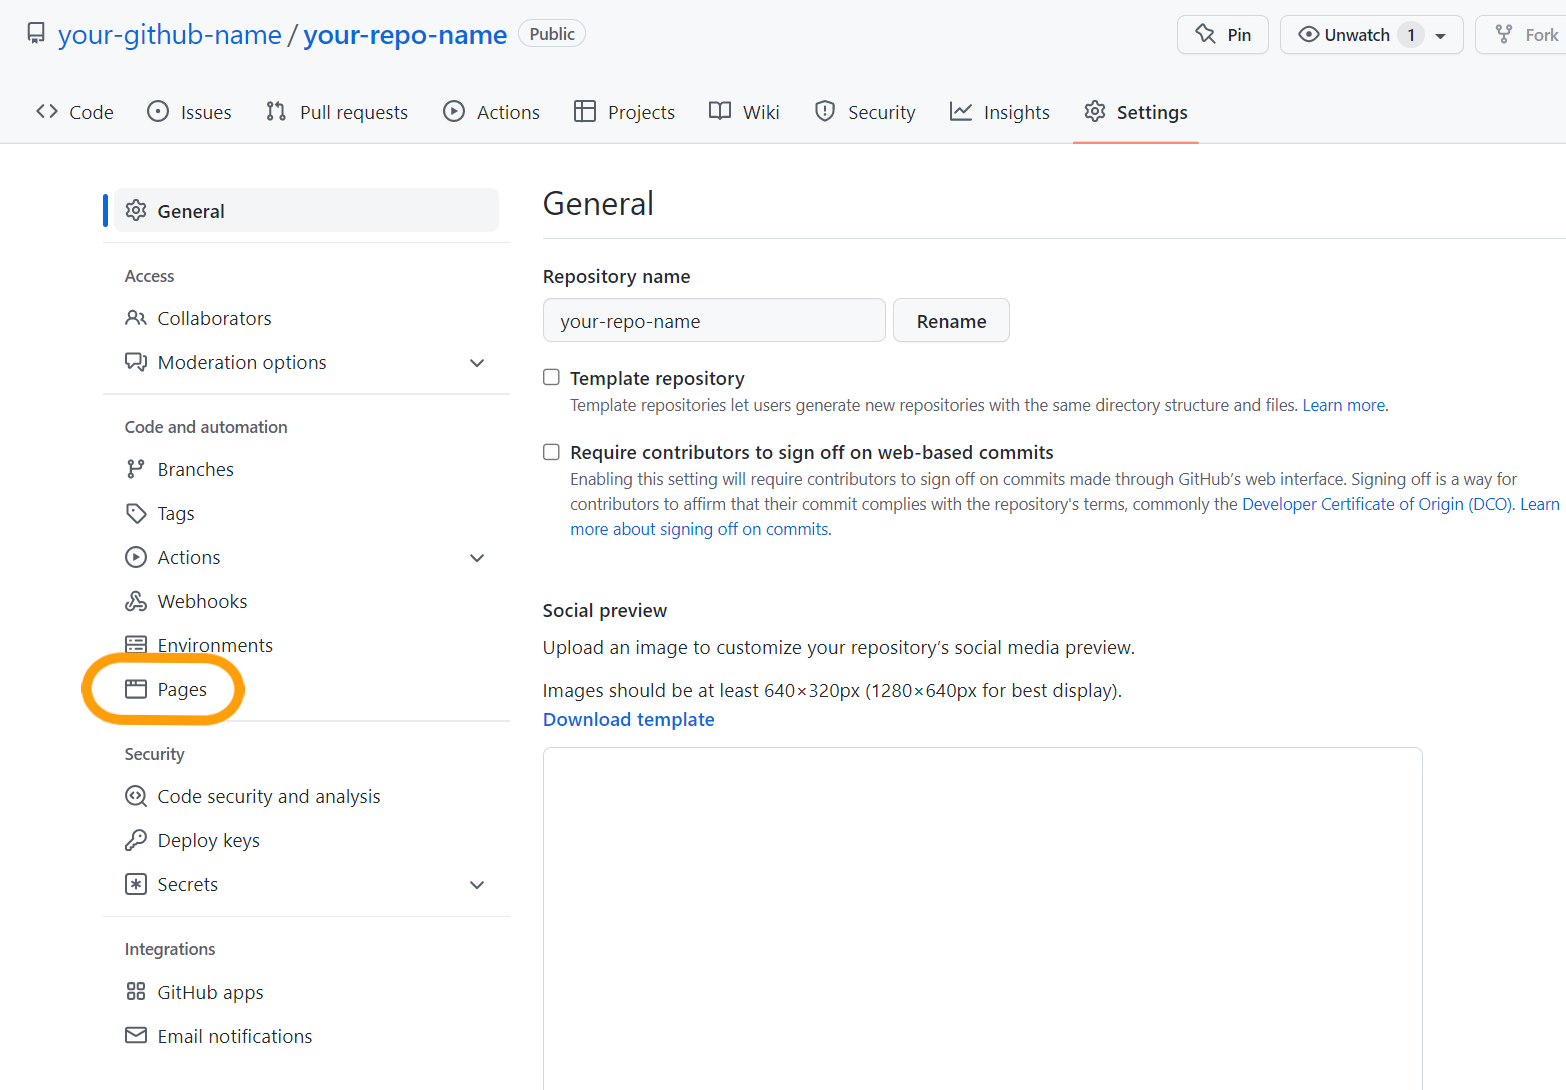
Now, leave this page and go to your github account. In your repo's main page, go to "settings", click on "Pages" tab.
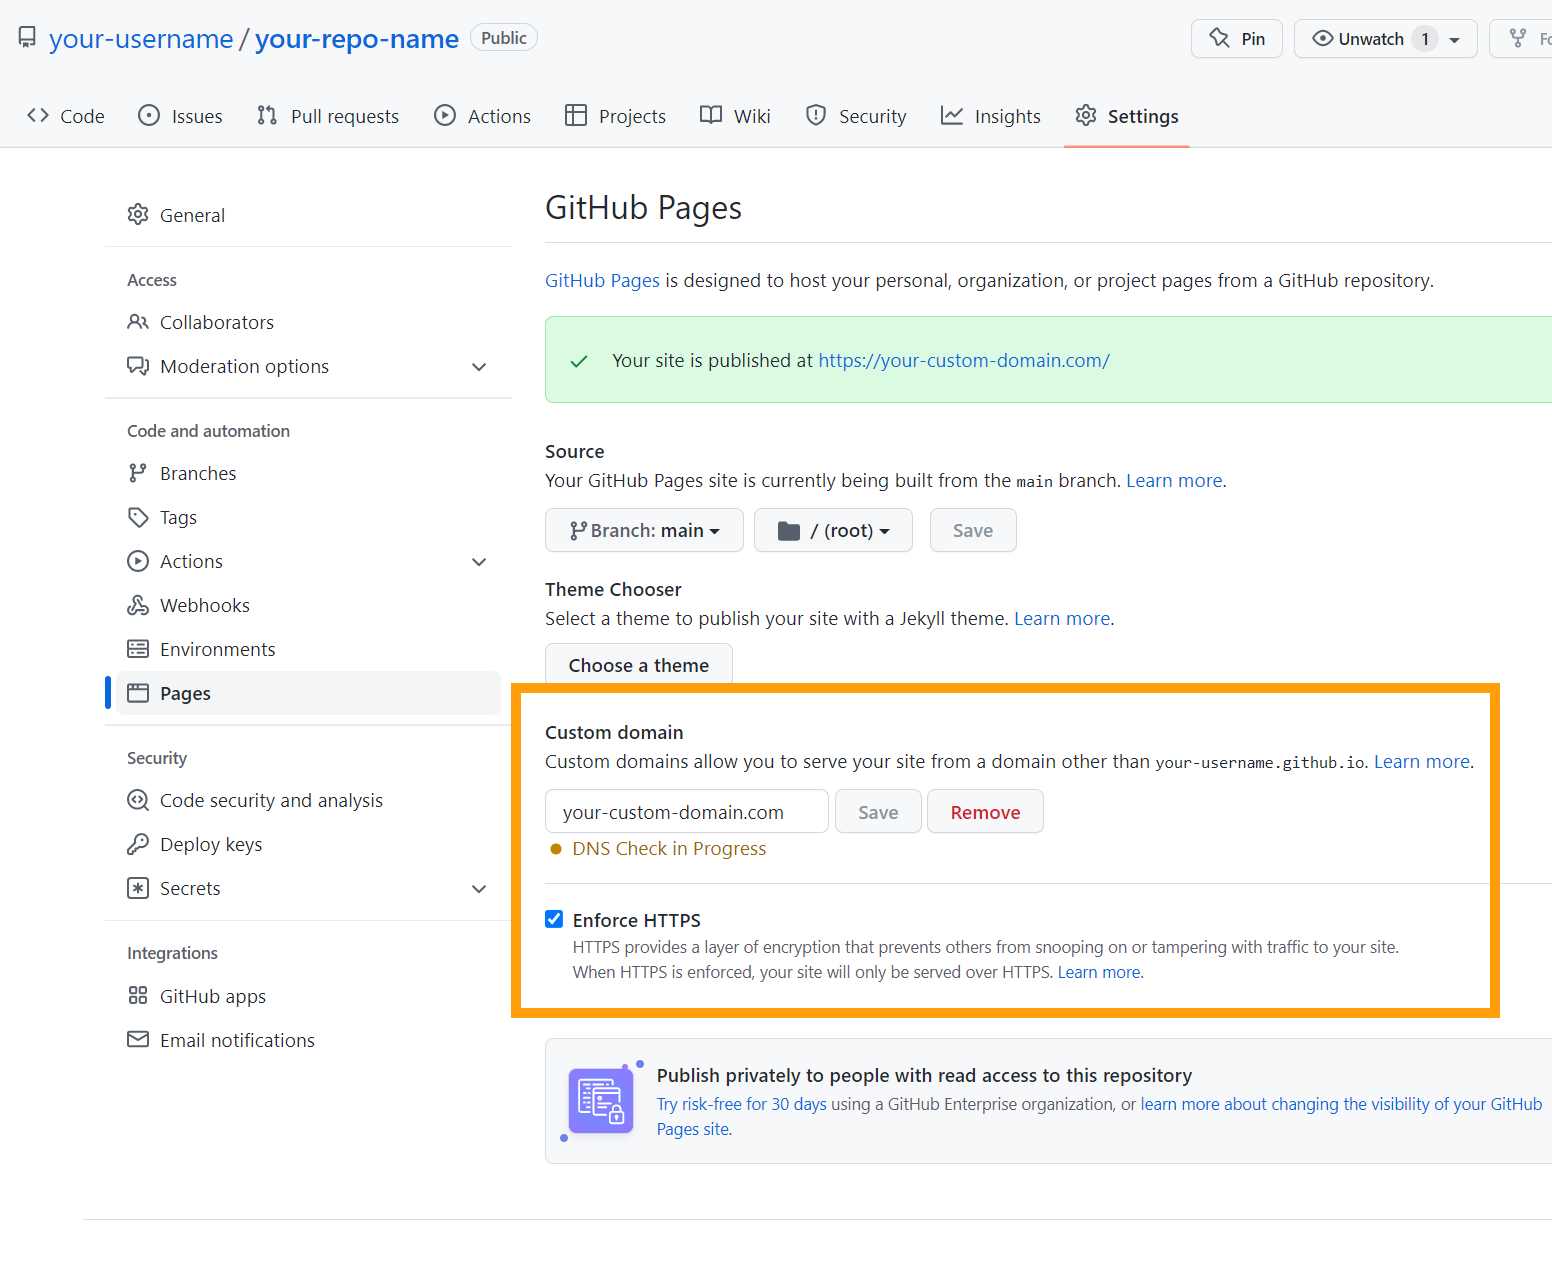
Step 5:
Finally type the name of your custom godaddy's domain into "Custom domain" field and click "Save". Under this field click on verify button and you've done it.
If you want a layer of encryption check "Enforce HTTPS" or buy a SSL certificate on godaddy.com.
Last step:
Visit your custom domain and enjoy it!